Install macOS Sierra on VMware Install macOS Sierra on VirtualBox Install macOS Sierra on MacBook with VMware Fusion Install macOS Sierra VMware Tools
Fix macOS Sierra Screen Resolution on VirtualBox
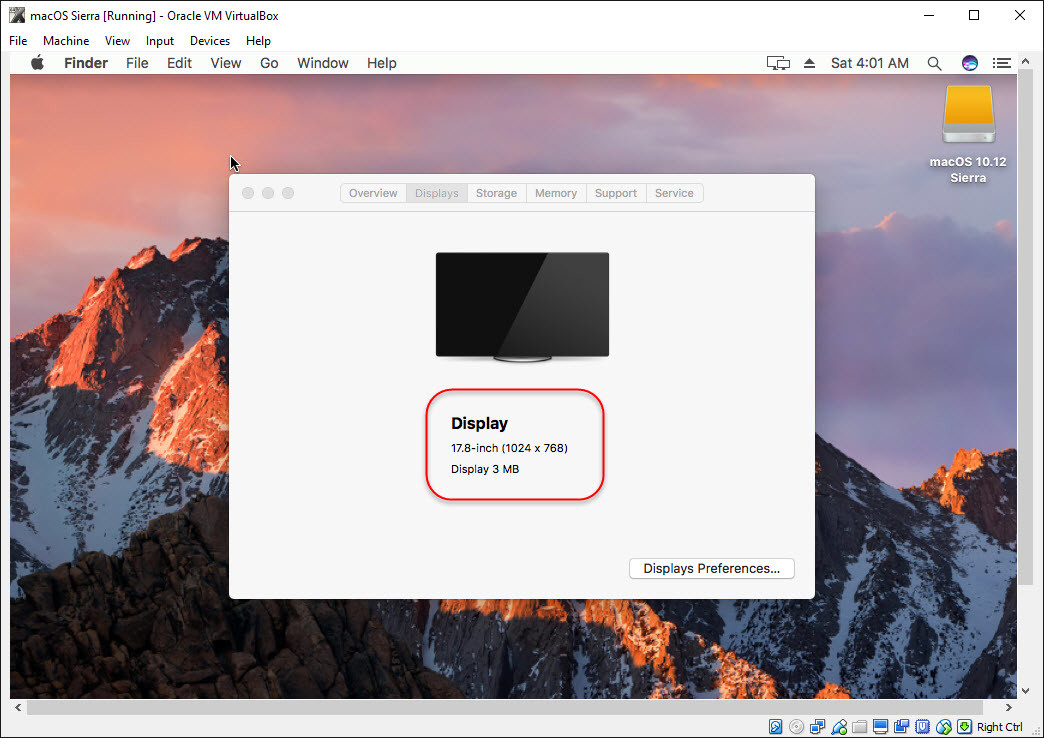
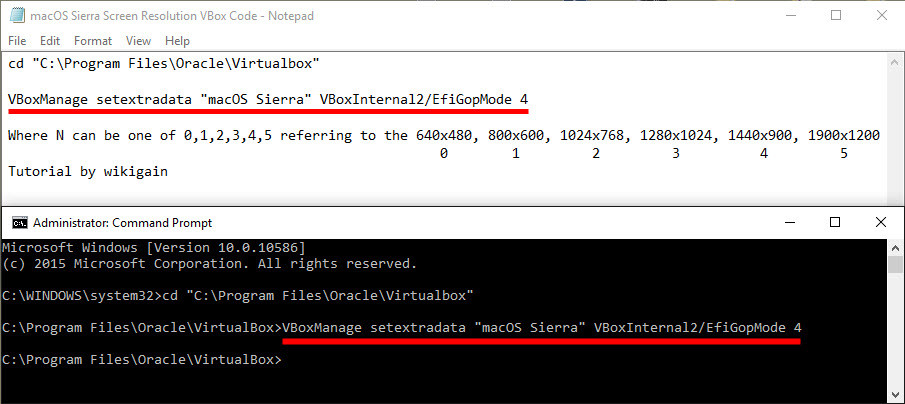
It is a prevalent and famous problem for those who install a Mac operating system on VMware or VirtualBox. For the first time when you install macOS Sierra or Mac OS X El Capitan on VirtualBox or VMware, the first error that you see is screen resolution and some other problem. By default when you install Mac Operating system on Virtualization software, most of the time the screen resolution is 1024×768, and you can change it on VirtualBox to “640×480, 800×600, 1280×1024, 1440×900, 1900×1200“. As an example, I want to change the resolution from 1024×768 to 1440×900. I hope you get something from this pictorial tutorial. Related Post: Fix macOS High Sierra Screen Resolution 4K, 2K, 1920×1080 Step #1. Play your installed macOS Sierra on VirtualBox and confirm the current and default screen resolution. After that turn off your VirtualBox VM and close all VirtualBox tabs. Step #2. Download the macOS Sierra Screen Resolution VBox Code from the link below.
Download Screen Resolution VBox Code
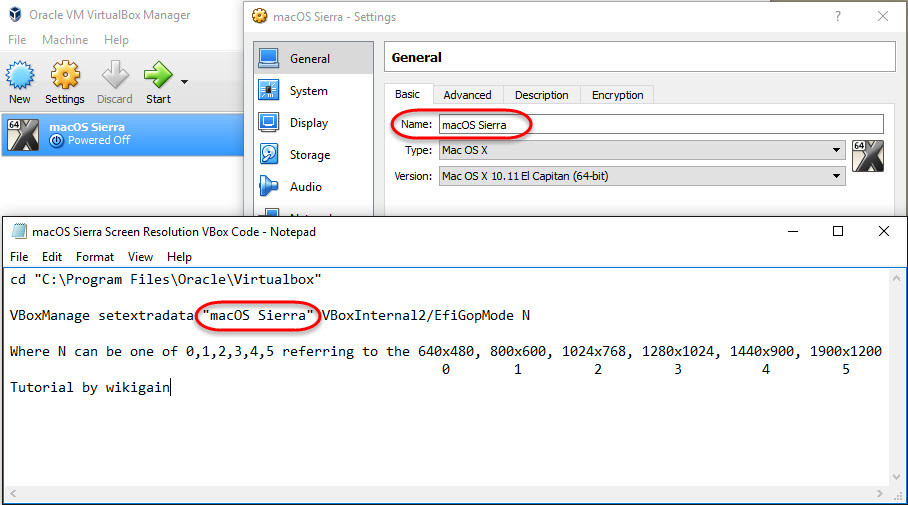
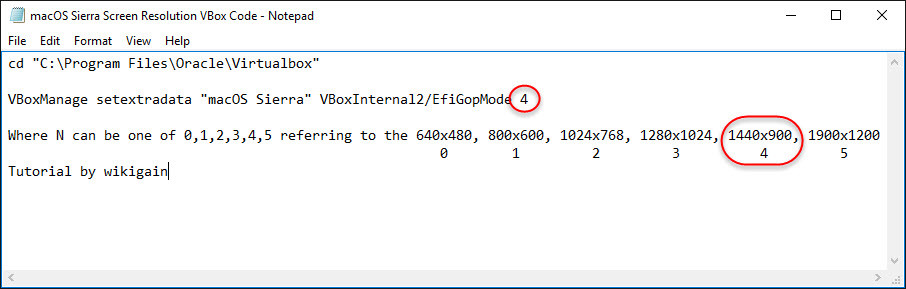
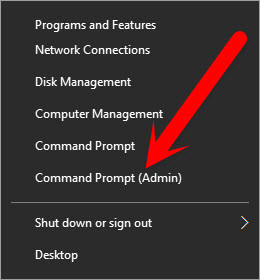
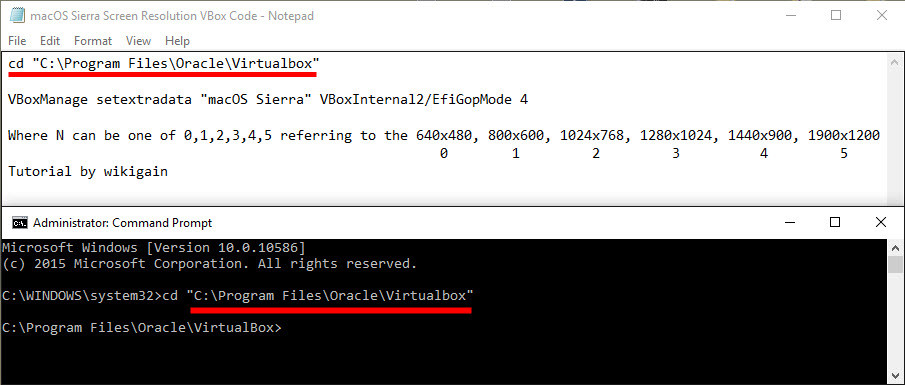
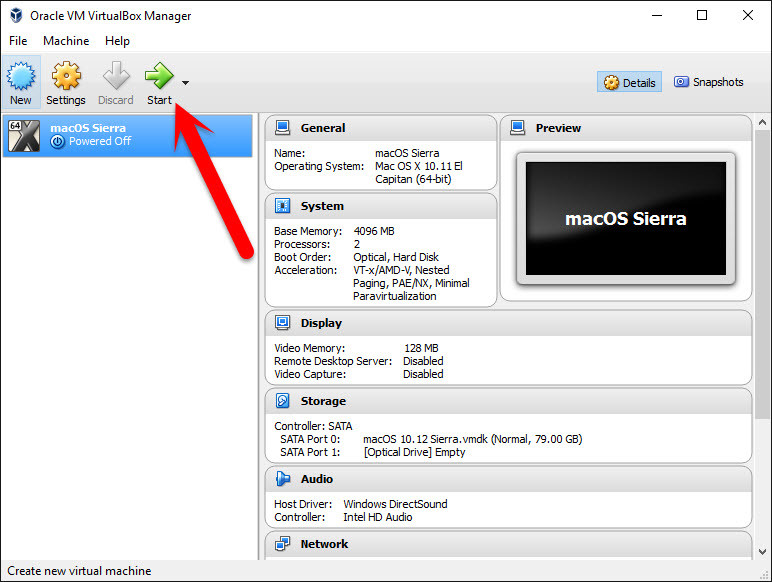
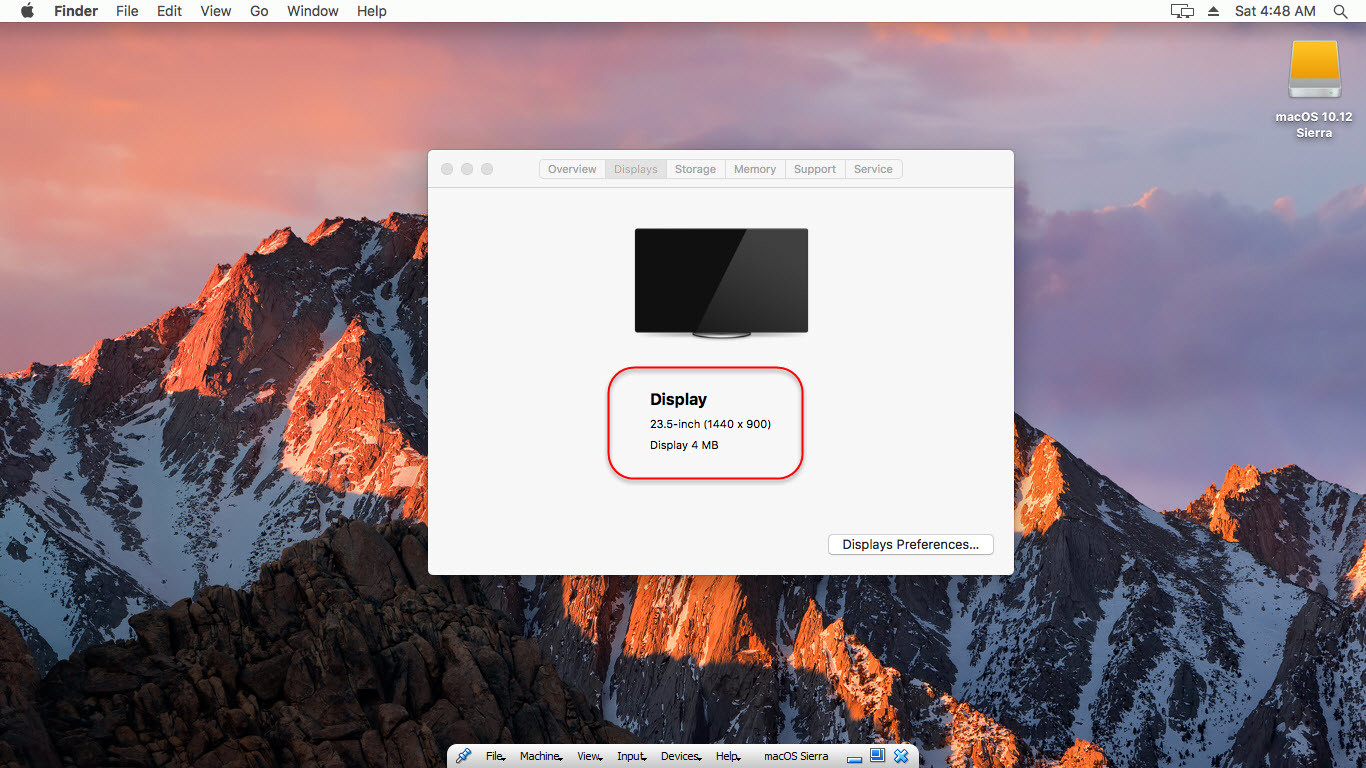
Step #3. Replace and edit the code that is named as “VM Name” to your macOS Sierra Virtual machine name, be sure it’s the same. Step #4. Choose the resolution of your screen monitor from the list below, to choose one just clean N and type the number of that resolution size. Step #5. Press Windows button + X and click on Command Prompt (Admin). Step #6. Select the VirtualBox path by the change directory command, so copy & paste the command to Command Prompt(CMD) then hit enter. Step #7. This time Copy & Paste the fixed screen resolution code to Command Prompt(CMD) then hit enter. Note: Be sure that you have selected a fix resolution for your monitor screen and choice the amount of N. after copying the code to virtual-box then close all tabs. Step #8. Start the installed macOS Sierra virtual machine from VirtualBox. Step #9. Now log in to your account and check the screen resolution to confirm it has worked or not. So was all.
Conclusion
In this article, I’ve covered how to fix macOS Sierra screen resolution on VirtualBox, and you saw that I changed the screen resolution from 1024×768 to 1440×900 From the above list that I’ve pointed. I only tested one of those sizes. Now, you can choose according to your monitor. If you’ve any kinds of question regarding this article or our old topics, feel free to share with us in the comment section below. Thanks for being with us.