How To Disable Windows 11 Search Indexing
In this article, we will be discussing how you can disable Windows 11 search indexing.
Disabling Windows Search Service
You can disable the Windows Search service to disable Search Indexing in Windows 11. To disable Windows Search service, follow the steps given below-
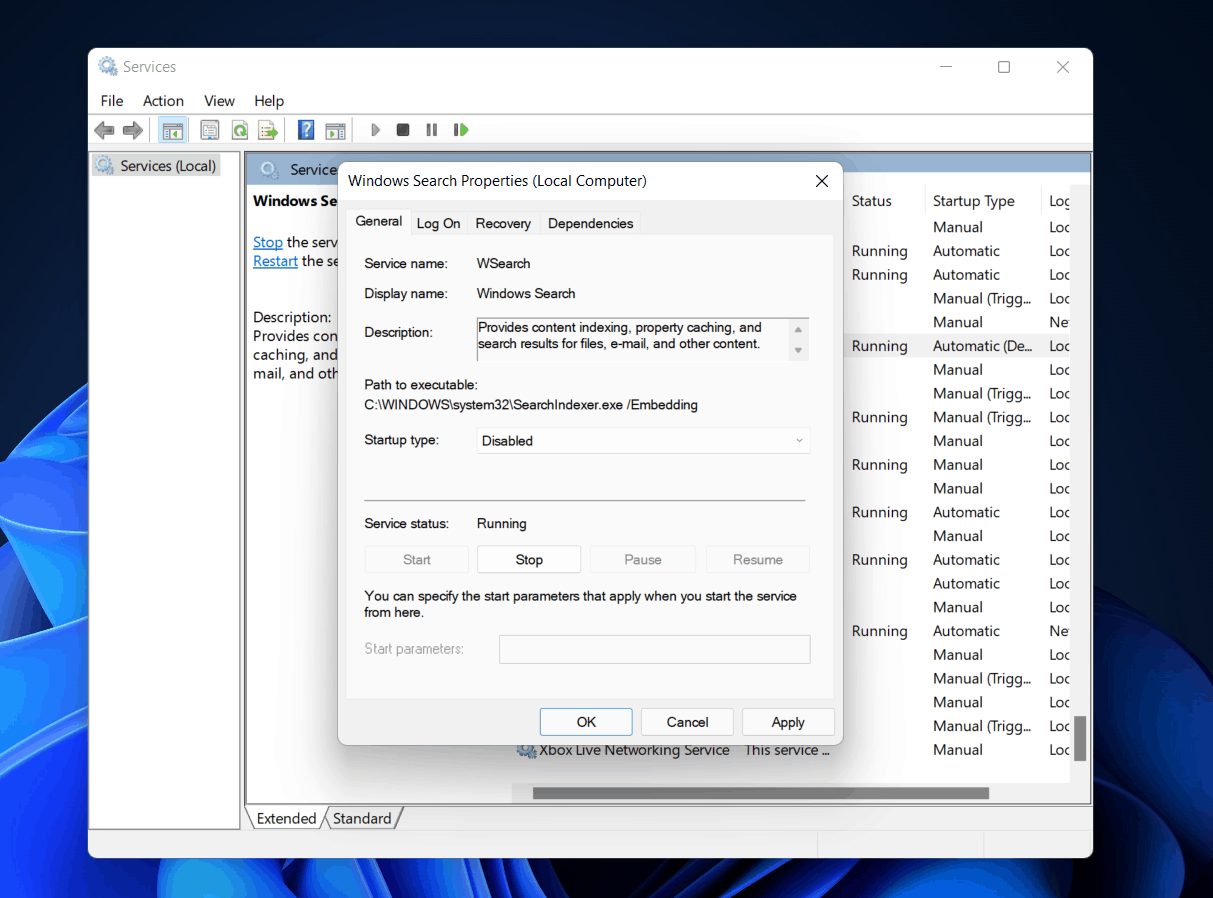
Press the Windows + R key combo to open the Run dialog box. In the Run dialog box, type Services.msc and click on OK or hit Enter to open the Services window. Here, search for Windows Search service. Double-click on this service to open its properties.
Now, set the Startup Type is disabled, and click on Stop in the Service status.Here, click on Apply and then click on OK. After doing so, restart your PC, and you should no longer face the issue.
Using Command Prompt To Disable The Windows 11 Search Indexing
Another way to disable the Windows 11 search indexing feature is using the command prompt. To do so, follow the steps given below-
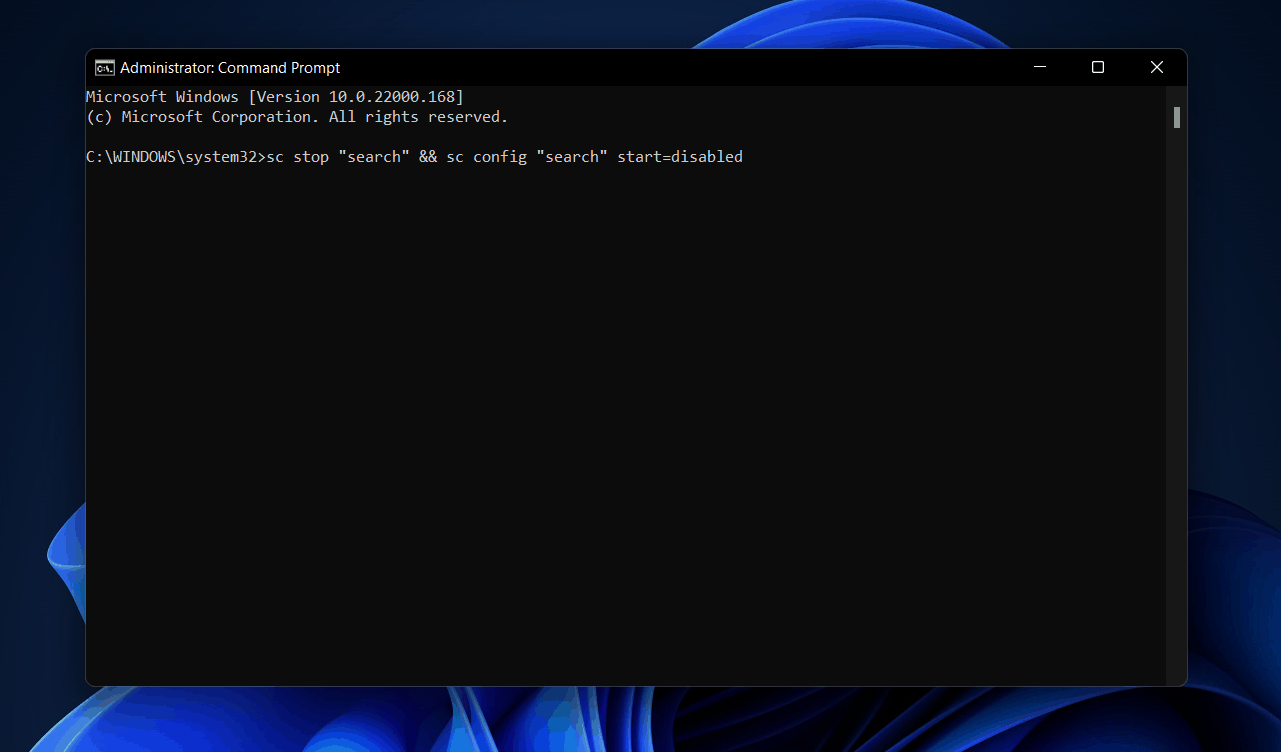
In the Start menu, search for CMD. Right-click on the Command Prompt, and then click on Run as administrator. In the Command Prompt, type sc stop “search” && sc config “search” start=disabled and hit Enter to execute the command.
Doing so will disable the Windows 11 search indexing.
Disabling Search Indexing For Particular Drive
If you don’t want to disable the search indexing for all drives/partitions on your PC, you can disable the search indexing for a particular drive. If you want to disable search indexing for a particular drive in Windows 11, then follow the steps given below-
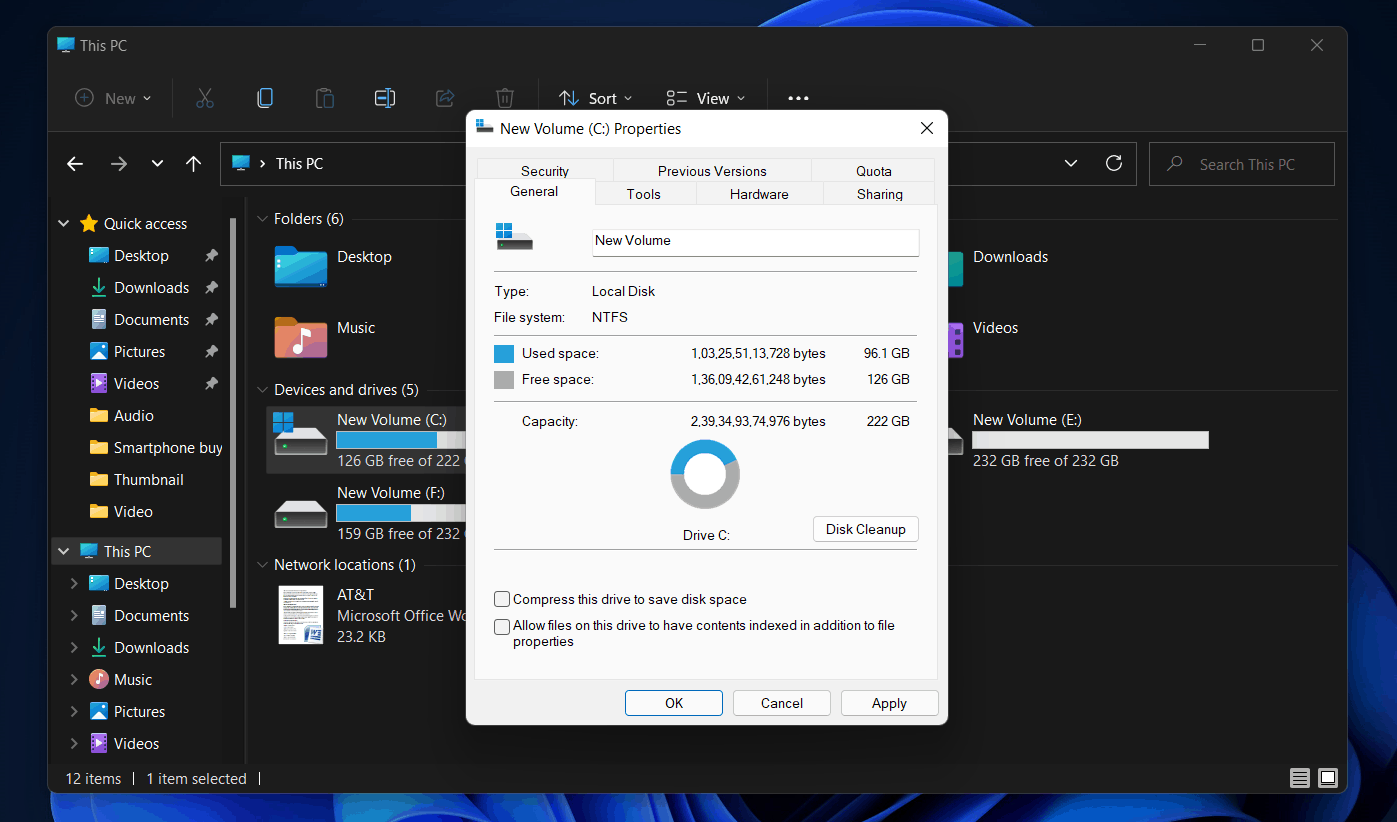
Double-click on the This PC icon to open the File Explorer, or you can press the Windows + E key combo to open the File Explorer on your PC.Now right-click on the drive for which you want to disable the search indexing. In the menu that opens up, click on Properties. Head to the General tab in the drive properties. Here uncheck the Allow files on this drive to have context indexed, and then click on Apply.
You will get a dialog box that will ask you to confirm whether you want to make the changes to only the drive or folders and subfolders inside.Click on OK to save the changes, and the search indexing will be made for the particular drive.
Enabling Search Indexing In Windows 11
You can easily enable search indexing in Windows 11. To enable search indexing in Windows 11, follow the steps given below-
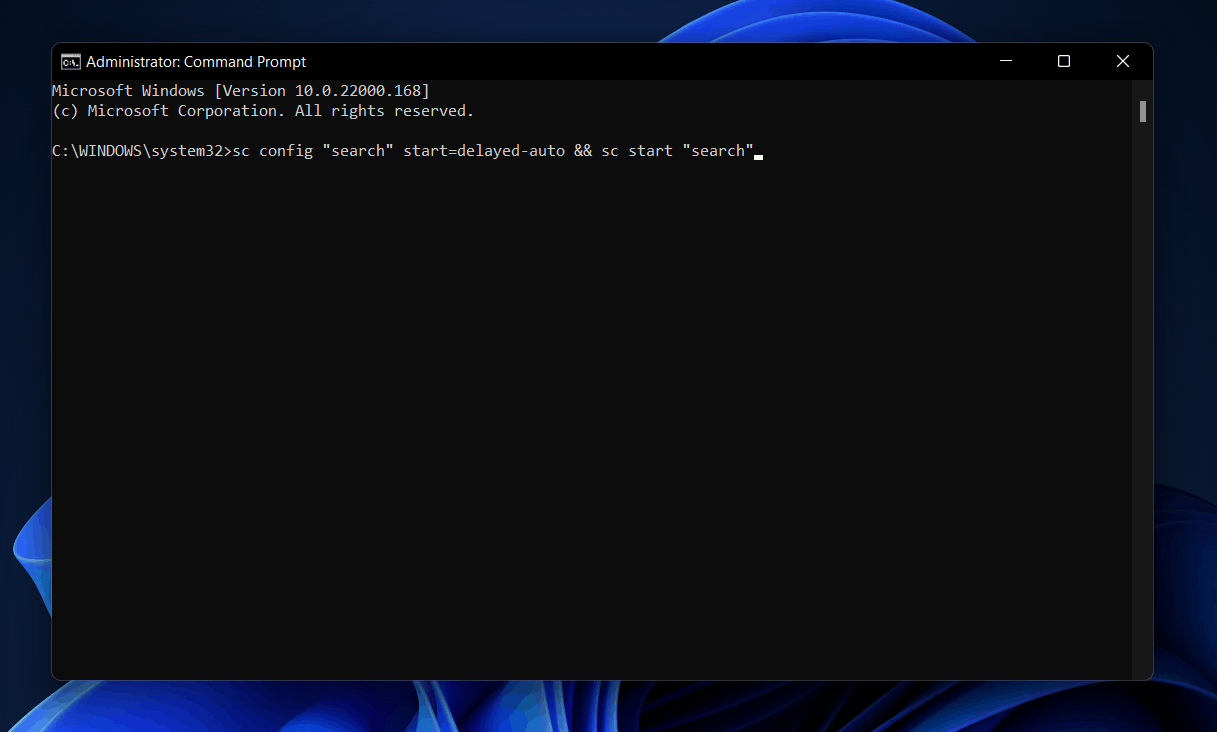
In the Start menu, search for CMD. Right-click on it Command Prompt and then click on Run as administrator.Type the command sc config “search” start=delayed-auto && sc start “search” in the Command Prompt, and hit Enter.
This will enable search indexing in Windows 11. RELATED GUIDES:
Does Indexing Slow Down Computer?
Sometimes PC can have issues with Search indexing, and it can cause the PC to slow down. If you face performance degrades, then it can be due to the search indexing enabled.
How To Fix Windows 11 Taskbar Crashing After UpdateHow To Open TGZ Files In Windows 11How To Enable Windows 11 Text-To-Speech Voice Typing
Final Words
This is how you can disabling or turn off the Windows 11 search indexing. If you want to enable it again, we have discussed how you can do that as well.
Δ